Casitas To Go highly recommends talking with your local Planning and Zoning department before ordering. We will need to know if there are any details that need to be included such as strapping types which may need to be installed before we finish the build.
There are strap downs at the four corners. They go from the rafters to the underside to tie downs to the ground. Similar to a shed installation.
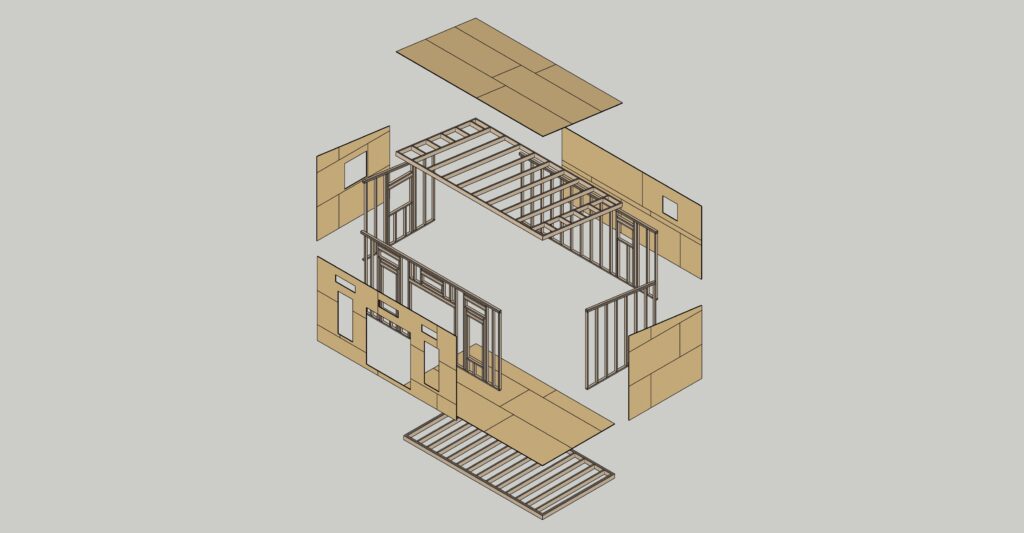
We build to IRC code 2021.
We recommend you consult a professional for the complete install, which includes but not limited to Casita resting spot and all connections.
Casitas To Go cannot answer this question; each site is different. Please check with your local planning and zoning department.
We can assist with any questions your Planning and Zoning department may have.
When talking with your Planning and Zoning department, they will need to know how you intend to use the Casita.
Please do your research. We will help in any way possible to get you approved.
We have over 30 years of combined construction experience with our team.
Once the delivery date is confirmed, you must be ready to take delivery of your Casita.
We will store your Casita for 3 days. On day 4 and beyond, there will be a storage fee of $175 per day.
We highly recommend you have all your details completed before we set the delivery date.
We make this extremely easy.
We supply the installer of your choice with a specific set of jacks we have designed to lift the Casita off the trailer. You simply lift with the jacks per our instructions and pull the trailer out, then set the Casita on your prepared site.
The downpayment is a non-refundable 50% of the total cost of the Casita purchased.
If you order the CUSTOM Casita, we require a 60% non-refundable deposit.
The build time is generally 6 to 8 weeks based on our current orders.
We will stay in communication with you, to give you the updates during the build process.
Once you place your deposit, we start the building process. Your deposit is non-refundable. Should you need to cancel, we have a solution.
We will offer your build for resale. This will allow us to refund your deposit. There will be an administration fee of $500 which will be deducted before funds are returned. The funds will only be refunded once there is a completed sale of your Casita.
There are a few ways to customize the two floor plans we currently have available.
You may select an exterior Sherwin Williams paint color at no additional cost. An exterior color change is a CUSTOM order. Please send us the color number and a pic of the color swatch.
We only do white currently on the interior.
You can upgrade the roof from shingles to a silver metal roof.
We can also offer AS AN UPGRADE a motorized or manual awning like one you would see on an RV. You will need to contact us for pricing and options.
You can upgrade the kitchen several ways. Right now, it is set up for a small dorm size fridge. We can shorten the countertop for a larger refrigerator. We will need the dimensions of the refrigerator to verify the space for the install.
Currently, there are no upgrades available for the bathroom.
Some customers have had us leave out the shower so they can install their own tile shower.
You can have your favorite dirt guy prepare a level site using one of the suggested requirements.
Two 4” x 6” x 19″ runners are preinstalled on the Casita.
Casitas To Go offers an easy to install, RV site ready Casita.
See our Privacy Policy for details on how we handle your information.